What An Adjuster Inspects
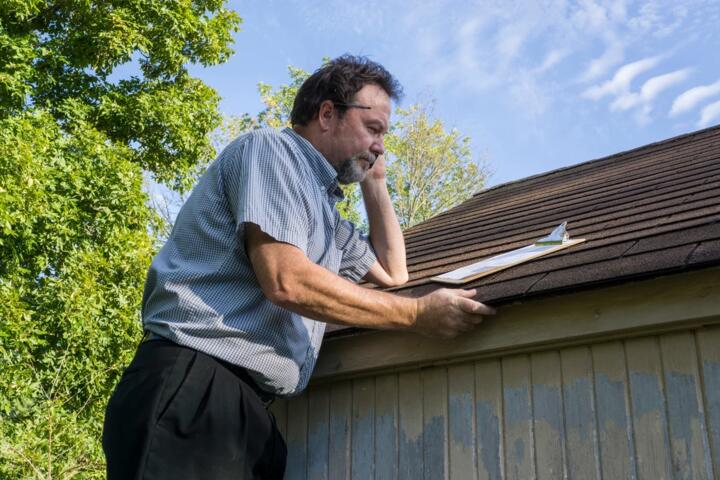
An insurance adjuster’s job is to confirm what happened, what damage occurred, and what coverage applies under your policy. The inspection is not a single photo session; it usually combines scene observations, vehicle or property documentation, and damage measurement against repair standards. In auto claims, the adjuster often starts with the visible damage and then moves toward systems that may not be obvious from the outside, like suspension alignment or internal components behind trim.
Adjusters also look for consistency between the reported loss and the evidence. That means they compare your statement, the timeline, witness information when available, and the physical signs of impact, water intrusion, or wear. When the loss involves theft, vandalism, or alleged pre-existing damage, the inspection order shifts toward verifying condition before the incident, which can include prior photos, maintenance records, or inspection reports.
For property claims, the order often follows a logic of safety first, then source identification, then measurement. A leak claim, for example, starts with locating the likely entry point and stopping ongoing water intrusion, then moves to documenting affected materials. For liability claims, the adjuster’s focus shifts toward collecting facts about events, locations, and potential injuries, which may involve statements and medical or incident documentation rather than a physical repair estimate.
Common Pain Points
People often assume the adjuster inspects everything in one pass. In practice, the adjuster may document what is needed for coverage and then request a separate repair estimate from a body shop or contractor, which can happen days later. That gap is where misunderstandings occur, especially when the vehicle is repaired before the adjuster has documented the damage.
Another frequent issue is incomplete documentation. If you only provide wide-angle photos, the adjuster may still need close-ups of fasteners, panel edges, tire sidewalls, or interior components. Adjusters also rely on measurements like tread depth, paint transfer patterns, and alignment indicators, and those details can be missed if the vehicle is moved without photos.
Supporting technologies shape what gets inspected and how. Many insurers use photo capture apps that tag images with timestamps and GPS coordinates, and some claims systems generate checklists based on loss type. Repair estimates often reference labor guides and parts catalogs, while structural damage assessment may require a frame measurement system. When a claim involves a vehicle with advanced driver assistance systems, the adjuster may also note whether calibration is required after repair, since calibration steps can affect both cost and safety.
Coverage questions create another dependency: the adjuster’s inspection order can change based on policy terms like deductibles, exclusions, and whether the claim is subject to appraisal or dispute resolution. If the claim is contested, the adjuster may gather additional evidence before any repair authorization, which can feel slow when you want the car back.
Solutions And Advice
Start With Safe Documentation
Before repairs begin, photograph the scene and the vehicle or property in a way that supports later comparisons. Use consistent angles: wide shots showing the whole damaged area, then close-ups of each damaged panel, seam, or component. Include readable details like license plates, VIN area labels when visible, and any warning lights on the dashboard. If you have a phone, check your camera settings so the date and time are correct; a mismatch can complicate timeline review.
If the vehicle is drivable, avoid washing it before documentation. Dirt and paint transfer can help identify contact points, and washing can remove those clues. If the vehicle is not drivable, keep it in the same condition as much as possible and record where it was towed from. I’ve seen claims where the first set of photos was taken after a wash, and the adjuster had to request a second inspection—annoying for everyone, and it rarely works the way the docs say.
Organize Evidence For The Adjuster
Bring a simple packet: your claim number, a short written timeline, and copies of key documents. For auto claims, that often includes the police report number if one exists, proof of ownership, and prior repair records if you’re aware of any related work. For property claims, include receipts for temporary repairs and any contractor estimates you already obtained. Many insurers accept uploads through a portal, and some systems show a version number for the claim file; if you see updates like “v3” after you upload, it means the file is being reprocessed.
Use file names that make sense later, like “2026-10-05_front_bumper_closeup.jpg” rather than “IMG_1034.jpg.” Adjusters and support staff may review hundreds of images, and clear naming reduces back-and-forth. If you’re asked for additional items, respond with the exact document requested rather than a bundle of unrelated photos.
Understand The Inspection Sequence
Adjusters often follow a sequence that starts with intake and triage, then moves to documentation, then to valuation. In auto claims, the first pass usually captures visible damage and identifies whether the vehicle needs a teardown or a structural measurement. The adjuster may then request a repair estimate from a shop, and the final step can include review of supplements if additional damage is found during repair.
For property claims, the sequence often goes: verify the reported cause and location, document affected materials, measure or estimate losses, and then confirm whether mitigation steps were taken. If the claim involves water, the adjuster may also check drying logs or moisture readings, since those records affect whether damage is considered part of the covered loss.
Plan For Estimates And Supplements
Repair estimates are usually separate from the adjuster’s inspection documentation. A body shop may use a estimating system that maps parts and labor to the vehicle’s make and model, then the adjuster reviews the estimate against policy terms and reasonableness standards. If the shop discovers hidden damage, it submits a supplement, and the adjuster decides whether to approve additional work.
Realistic outcomes depend on the type of damage. Minor bumper or trim damage may be resolved quickly once photos and an estimate are reviewed. Structural or electrical damage often takes longer because it may require disassembly, scanning, and calibration. If your vehicle has advanced sensors, calibration steps can add time even when the visible damage looks small.
Case Examples
Auto Claim With Hidden Damage
A driver reports a front-left collision and submits photos showing a cracked headlight housing and a dented fender. The adjuster documents the visible damage and notes that the bumper cover alignment looks off. The shop later removes the bumper and finds a bent bracket and damage behind the grille. The shop sends a supplement with photos of the internal components and a revised estimate, and the adjuster approves the added parts after reviewing the supplement details.
The lesson is about order: the first inspection captures what is visible, while the later supplement stage captures what becomes visible after teardown. If the vehicle had been repaired immediately without documentation, the adjuster would have had less evidence to support the hidden damage portion.
Property Claim With Ongoing Source
A homeowner reports water damage from an upstairs bathroom. The adjuster visits, documents wet drywall and flooring, and checks for signs of an active leak. The adjuster requests proof that the water source was stopped and that drying steps were started, then measures the affected areas. After mitigation, the contractor provides an estimate for repairs, and the adjuster compares it to the documented extent of damage.
Here, the inspection order matters because the adjuster separates damage caused by the covered event from damage that could have continued due to an unresolved source. If the leak had continued for days without mitigation, the claim could be adjusted based on the evidence available.
Inspection Checklist And Table
Use this checklist to align your preparation with the inspection sequence. It’s decision support, not a promise of outcomes.
| Step | What The Adjuster Checks | What You Can Prepare | Common Delay Trigger |
|---|---|---|---|
| 1. Intake And Triage | Claim facts, location, reported cause, and immediate safety issues | Claim number, timeline, photos from the first day, police report reference if applicable | Missing timeline details or unclear cause |
| 2. Visible Damage Documentation | Exterior damage, affected materials, and evidence consistency | Wide and close-up photos, readable labels, dashboard warning lights | Photos taken after washing or moving the vehicle without documentation |
| 3. Valuation Inputs | Repair scope, labor and parts reasonableness, calibration needs | Shop estimate request, prior repair records if relevant | Estimate missing required steps like sensor calibration |
| 4. Supplements And Review | Hidden damage found during repair, updated costs | Teardown photos, supplement documentation from the shop/contractor | Repair started before documentation, limiting evidence |
Step-by-step checklist you can follow the same day:
- Write a short timeline with times, locations, and what you observed.
- Take wide photos and then close-ups of each damaged area, including seams and edges.
- Capture dashboard warning lights and any visible fluid leaks.
- Photograph the surrounding area if it helps show contact points or conditions.
- Save receipts for towing, temporary repairs, or mitigation steps.
- Upload files with clear names and confirm the claim portal shows them as received.
Common Mistakes
Starting repairs before the adjuster documents damage is the most common mistake in auto claims. Even when the repair is urgent, you can often pause until you have at least a photo record and an inspection note. If you must proceed, document the condition before work begins and ask the insurer how to handle evidence.
Another mistake is relying on a single photo set. Adjusters often need close-ups of panel edges, tire damage, and interior components, and they may request additional images after the first review. If you wait for that request, the claim timeline can stretch because each new upload triggers a re-review.
People also over-share or contradict themselves in statements. A vague timeline like “sometime in the afternoon” can be workable, but a later statement that conflicts with the photos or the police report can slow the investigation. Keep your written timeline consistent with what you told the insurer.
For property claims, skipping mitigation steps can create a coverage dispute. If water damage continues because a leak wasn’t stopped, the adjuster may treat part of the loss as preventable. Drying logs and contractor notes can matter, and it’s frustrating when they’re missing because the work was done quickly.
FAQ
What Does An Adjuster Look For First?
They confirm the reported cause, check for safety issues, and document visible damage with photos and notes so the claim file has a clear baseline before valuation and repair estimates.
Do I Need To Wait For The Adjuster Before Repairs?
In many auto and property claims, you should avoid repairs until the adjuster has documented the damage. If repairs are necessary to prevent further loss, document the condition first and keep receipts for mitigation.
Why Do Adjusters Request More Photos After The First Visit?
They may need close-ups of specific components, measurements, or evidence of hidden damage. The first inspection often covers what is visible, while later review may require details tied to parts and labor.
How Are Repair Estimates Reviewed?
Adjusters typically compare the shop’s estimate to policy terms and reasonableness standards, and they review whether required steps like sensor calibration or structural measurements are included.
What Can Slow Down A Claim Inspection?
Missing documentation, inconsistent timelines, repairs started before evidence is captured, and incomplete estimates that omit required steps can all delay review and approvals.
Author's Insight
Adjuster inspections follow a practical logic: document the baseline condition, confirm the reported cause, then translate evidence into valuation inputs for repair or loss calculation. The order changes by claim type—auto claims often move from visible damage to teardown and supplements, while property claims often move from source identification to measurement and mitigation proof. Evidence quality matters because photos, receipts, and timelines become the record when hidden damage is discovered later. If you prepare a clear photo set and a consistent timeline, the inspection process usually runs with fewer interruptions, even when the final payout depends on policy terms.
Key Takeaways
- Inspections happen in stages: documentation first, then valuation inputs, then supplements after teardown or further discovery.
- Photo quality and timing affect what the adjuster can verify, especially for hidden damage and timeline consistency.
- Repair estimates are often separate from the adjuster’s initial documentation, and supplements can change the scope.
- Mitigation steps and receipts matter in property claims, since ongoing damage can complicate coverage.
- Avoid starting repairs before documentation unless you must prevent further loss, and keep your evidence organized.