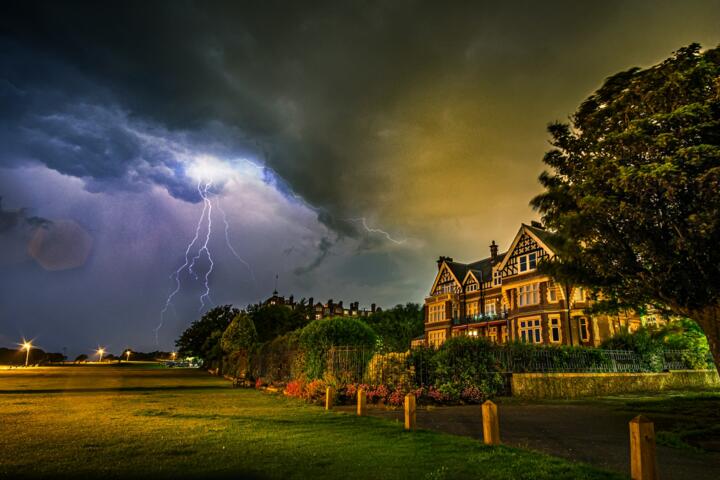
Why the Need for Photos
Storm damage claims rely heavily on visual evidence. Insurers often request images to evaluate loss magnitude and authenticity before payout. In 2022, over 1.1 million property claims in the U.S. included photo documentation. Clear pictures can speed settlements by up to 30%. For example, capturing your roof's condition before a hurricane helps define pre-existing issues versus storm impact. Visual records reduce disputes that drag claims out for months.
Imagining a flood scenario: video or photos taken after water recedes won't tell the full story if nothing was captured beforehand. Photos link what was insured and what was lost.
Basics matter: sharp, well-lit images covering full rooms and exterior views carry weight. The right frame can be difference.
Common Pitfalls
Many homeowners snap pictures hastily, which weakens their claim. Blurry or underexposed shots make damage analysis guesswork. Ignoring key areas—like water damage signs behind appliances or structural cracks—can cost thousands in lost reimbursements. People miss the chance to photograph nonstructural assets, like high-value hardwood floors or built-in shelving that also suffer damage.
Lacking date or location context often leads insurers to question photos’ validity. Phones embed metadata, yes, but that’s not always accepted. Leaving timestamps off physical prints complicates matters more.
One issue is not capturing multiple perspectives or scale. A small scratch might look insignificant without a ruler or common object beside it. Those details matter for a thorough claim.
Finally, many underestimate weather conditions while photographing. Dull or shadowed photos can alter color perception relevant to identifying mold, soot, or burn marks.
Photo Tips and Tools to Try
Use a Digital Camera with Manual Settings
Smartphones work fine but high-quality cameras help. A DSLR or mirrorless camera, like Canon EOS Rebel T7 (v1.2 firmware), offers manual focus and ISO control for sharper images in low light. Set ISO between 100-400 to avoid graininess indoors. Adjust aperture to a mid-range f/5.6 to keep detail across surfaces.
Capture Wide and Close Shots
Wide-angle shots show overall room layout or exterior sections such as siding, roofing, and foundation. Close-ups detail damage textures, such as cracked drywall or shattered tiles. Use a 24mm lens for wide shots, and switch to 50mm or macro for details. Macro lens (60mm) catches paint blistering patterns, which signal water penetration.
Include Scale References
Place a tape measure, coin, or common item next to damage. It adds scale context for adjusters. A penny is handy for small cracks. This method clarifies size, making minor versus major damage distinction easier.
Photograph from Multiple Angles
Take at least three angles: front, side, and close-up. This showcases damage extent fully. For roof inspection, climb safely with ladder; shoot straight down and diagonally for texture detail. Drones like DJI Mini 3 Pro help inspect larger roofs or upper stories especially if access is risky.
Create a Photo Log File
Maintain an organized spreadsheet listing photo number, date, description, and location. This prevents missing images or confusion during filing claims. Apps such as Evernote or Google Photos add tags for easy retrieval.
Time Photos Around Natural Light
Morning or late afternoon light casts shadows revealing surface irregularities better than midday glare. Avoid shooting in harsh sunlight or poor indoor lighting which flatten textures and colors. Use a portable LED panel as backup indoors if necessary.
Regularly Update Your Catalogue
Review and refresh photos at least twice yearly. Each update confirms recent upgrades or repairs against natural wear, avoiding false damage claims. April and October work well to catch seasonal changes related to storms.
Back Up Photos Securely
Yet, cloud storage like Google Drive or Dropbox adds redundancy against data loss. External drives provide an extra layer of safety, particularly where internet reliability is shaky.
Label Photos Clearly
That file name I use starts with date (YYYYMMDD), then room or exterior, then damage type. For example, 20240312_Kitchen_RoofLeak.jpg saves confusion later. Organizing this way speeds sorting when claim adjuster calls.
Real Claims with Evidence
A homeowner from Texas faced a hailstorm in March 2023 that punctured her roof. She had clear pre-storm images of her shingles, roof vents, and gutters with a scale. After filing her claim with Allstate, payouts arrived within 14 days for $4,350—30% faster than neighbors without photos.
Another case involved a Florida family suffering flash flooding. Pre-flood images captured basement condition, HVAC system, and custom cabinetry. Photos documented water entry points clearly. Their insurer accepted the claim nearly intact, covering 95% of losses, instead of denying the majority, due to photographic proof.
Checklist Before a Storm
| Step | Action | Tools | Tip |
|---|---|---|---|
| 1 | Inspect exterior and interior | Camera, ladder | Mark damage spots in notes |
| 2 | Take wide and close shots | DSLR / phone | Include everyday objects for scale |
| 3 | Note date and location | Metadata, manual notes | Rename files chronologically |
| 4 | Back up collections digitally | Cloud drives, hard disk | Store extra copies offline |
| 5 | Update photos periodically | Scheduled calendar alerts | Prioritize pre- and post-storm |
Photographing Errors to Dodge
Skipping outdoor shots. Many focus only indoors, missing roof and siding damage. That leads to missing claim parts. Forgetting backups risks permanent loss of files if devices fail. Shooting at night with flash produces flat images void of texture. Hurrying through images strains details. One set of photos never captures everything—you must expect to take many, delete poor shots, and refine.
Avoid unorganized sets. Without labeling or logs, insurers face confusion—a reason to deny or delay claims. Another misstep: ignoring watermarks or timestamp options on digital camera apps that validate photo timing.
FAQ
How often should I update photos?
Update images twice a year, especially before and after storm seasons, April and October work well.
Can smartphones replace cameras?
Modern phones can suffice but DSLR cameras offer sharper, adjustable images, especially under tricky lighting.
What if I lack ladder access?
Use drones or ask professionals for rooftop shots, safety matters more than everything.
Are timestamps mandatory on photos?
Timestamps add credibility. Use camera apps that embed them or maintain a dated photo log.
Should I photograph everything or select damage only?
Photograph whole areas before zooming on damage. It shows context and proves original condition.
Author's Insight
I've photographed hundreds of homes for insurance claims; nothing replaces good prep. Clear photos save hours of back-and-forth with adjusters. I recommend investing in a basic DSLR for high-res images. Don’t trust phone metadata alone; keep detailed logs. Last spring, a property I documented with scale references received full payout after hail damage, a process that usually drags on.
Key Takeaways
Photographing your home effectively before storm damage pays off. Prioritize quality images with varied angles, scale tools, and clear documentation. Back up everything and update periodically. Incorporate clear labeling and lighting tactics. These efforts build a solid claim foundation and reduce delays or rejections from insurers. Start building your photo archive now; storms won’t wait.